Wireless Communication Between Two Arduinos Circuit Basics
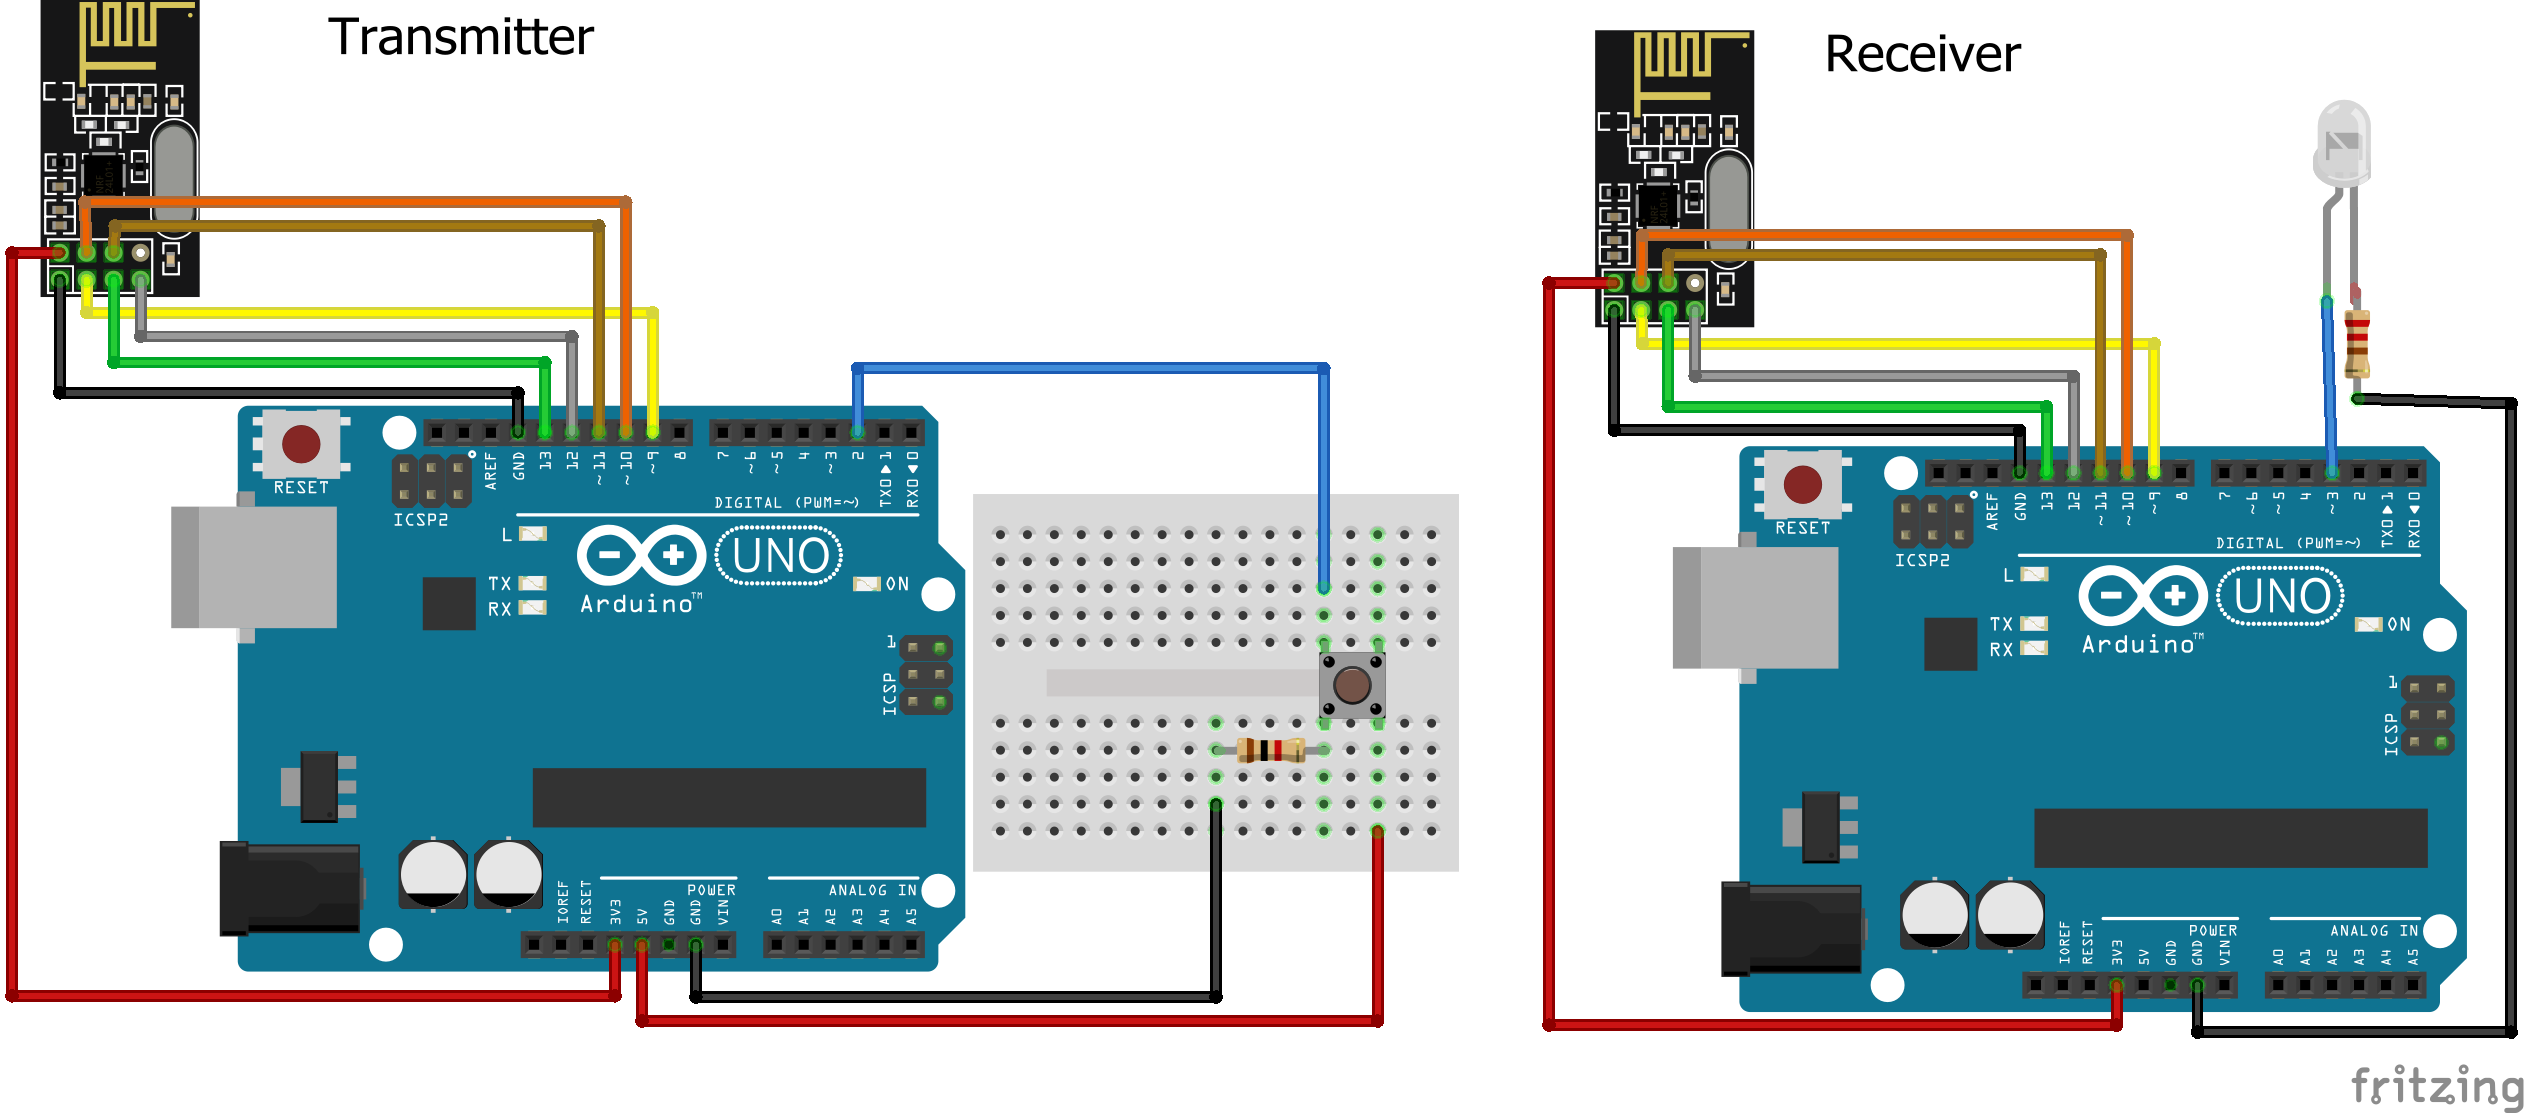
Demonstration of Basic Arduino Wireless Communication. It's now time to test it out. We have the transmitter on one side with the receiver on the other. When we press the switch, you will notice that the LED will light up instantly. The video demonstration of Arduino Wireless Communication using NRF24L01 Transceiver Module is attached below.
Introduction Wireless Power Switch with Arduino & the CC3000 WiFi Chip Adafruit Learning System
Currently, this button hardwired to an Arduino input pin and is normally connected to ground through a pull down resistor, but is connected to +5v when the switch is closed. I'm looking for a way to make this "start" button wireless. I'm ignorant enough about this that I'm having trouble figuring out what I should be searching for.
nRF24L01 Interfacing with Arduino Wireless Communication Hackster.io
After 5 seconds, the interface will make a query to the Arduino board and update the data accordingly: You can now also test the different buttons of the interface. By default, the switch is turned off, so click on the "On" button to turn it on instantly.

Iono MKR Industrial Arduino PLC WiFi BLE GSM NBIoT LoRa SigFox FCC Arduino, Development
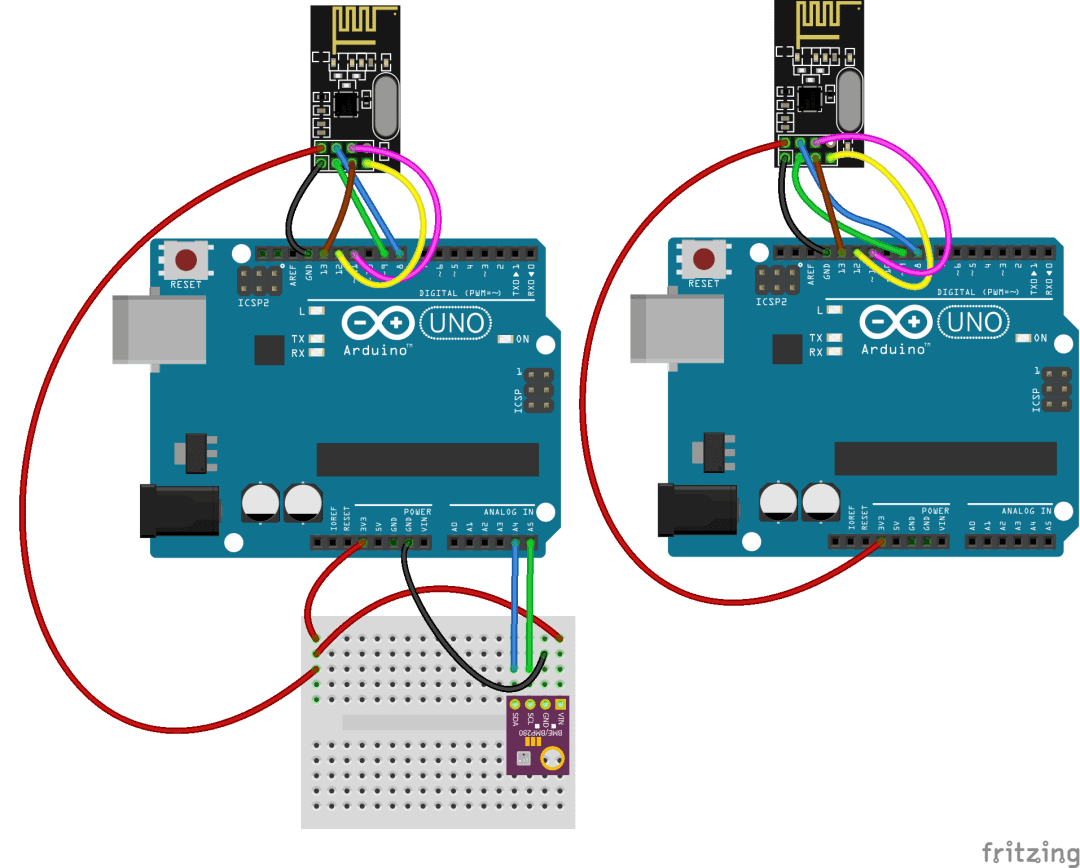
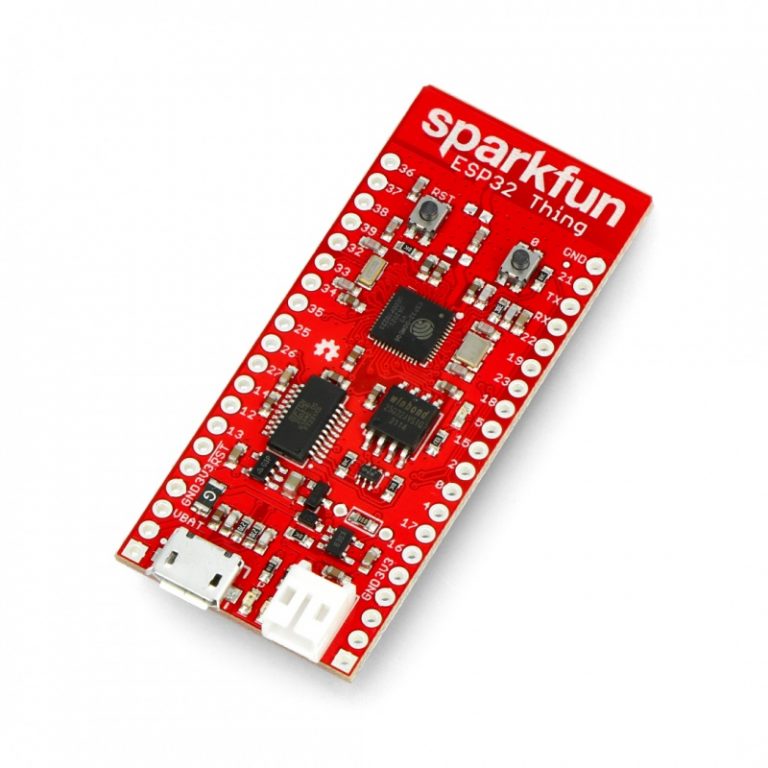
desk lamp as an example) and switch this device on or off via WiFi. Using the interface that we are going to build, you'll also be able to wirelessly control the device that is connected to the switch from the click of a button. Let's dive in! Hardware & Software Requirements First, I used an Arduino Uno board for the core of this project.
Flashing a Custom Firmware to Sonoff wifi switch with Arduino IDE by Jeffrey Roshan Medium
In this tutorial we will learn how to make wireless communication between two Arduino boards using the nRF24L01 transceiver modules. The nRF24L01 module is very popular choice for wireless communication when using Arduino. I have already used this module for numerous Arduino projects and you can check out some of them here:

Sonoff WiFi Smart Switch With I2C Port JackenHack Iot Projects, Arduino Projects, Diy
The Arduino IDE 2.0 is open source and its source code is hosted on GitHub. DOWNLOAD OPTIONS. Windows Win 10 and newer, 64 bits Windows MSI installer Windows ZIP file. Linux AppImage 64 bits (X86-64) Linux ZIP file 64 bits (X86-64) macOS Intel, 10.14: "Mojave" or newer, 64 bits macOS Apple Silicon, 11: "Big Sur" or newer, 64 bits.
Wireless Communication Between Two Arduinos Circuit Basics
Wireless transfer data to an Arduino by way of 433MHz transmitter/receiver modules by using the RH_ASK. we will learn how to use the very famous 433MHz modules with an Arduino so we can get two Arduino's to wirelessly communicate. BOM. 2 x Arduino Uno - 1050-1040-ND; 433MHz transmitter and receiver - 1597-1223-ND; Jumper wires - 1568-1513-ND;
Wireless Switch Controller r/arduino
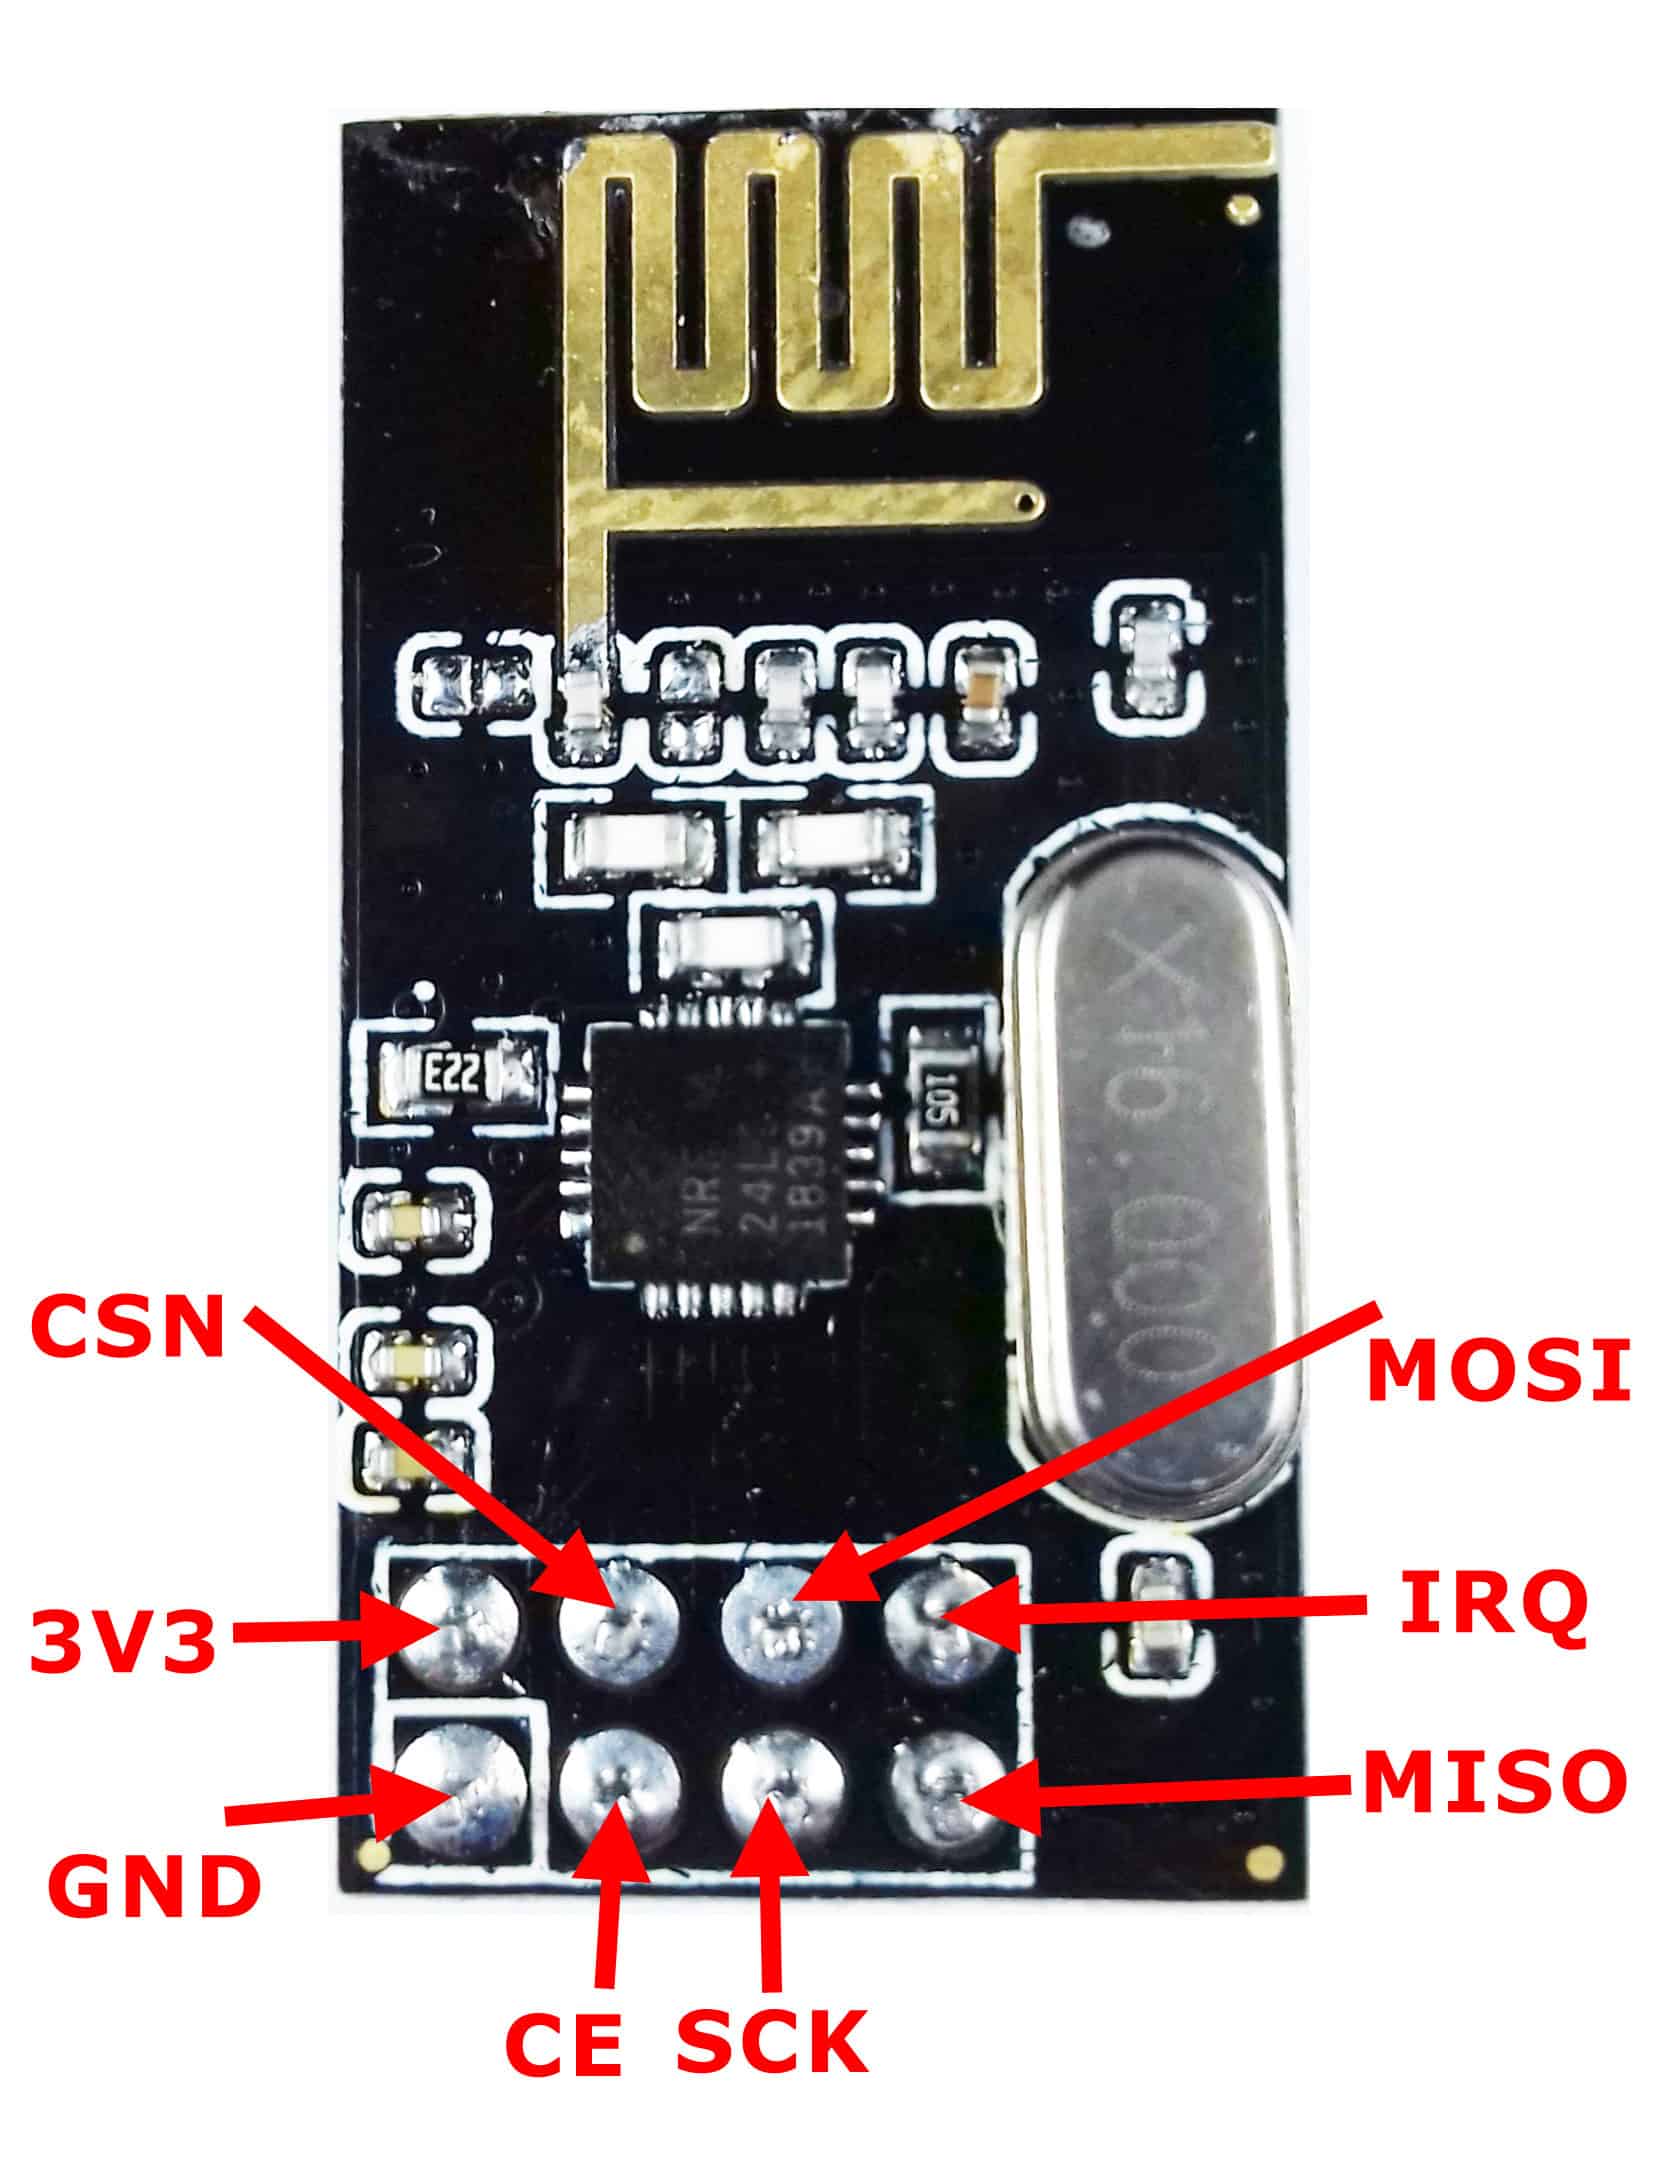
NRF24L01+, a popular 2.4GHz RF wireless Transceiver Module among Arduino Users. Regarded highly for its cost to performance ratio, it features specs that's one of the best in its league. This blog aims to explain what it's capable of, alongside an NRF24L01 Arduino Guide.. Switch and Nano configuration: The switch is connected to the GND and.
Project Arduino Wireless Switch Berbasis ESP8266 dan Aplikasi Blynk Arduino Libs Ayo Belajar
Step 1: Schematic, Code & Parts List. Wire it up like the above schematics, The Schematic with the NANO is for the TRANSMITTER and the Schematic with the UNO is for the RECEIVER. MAKE SURE that you have installed the following libraries. Download RF24.h Here SPI.h nRF24L01.h RF24.h Parts list! Arduino UNO for receiver
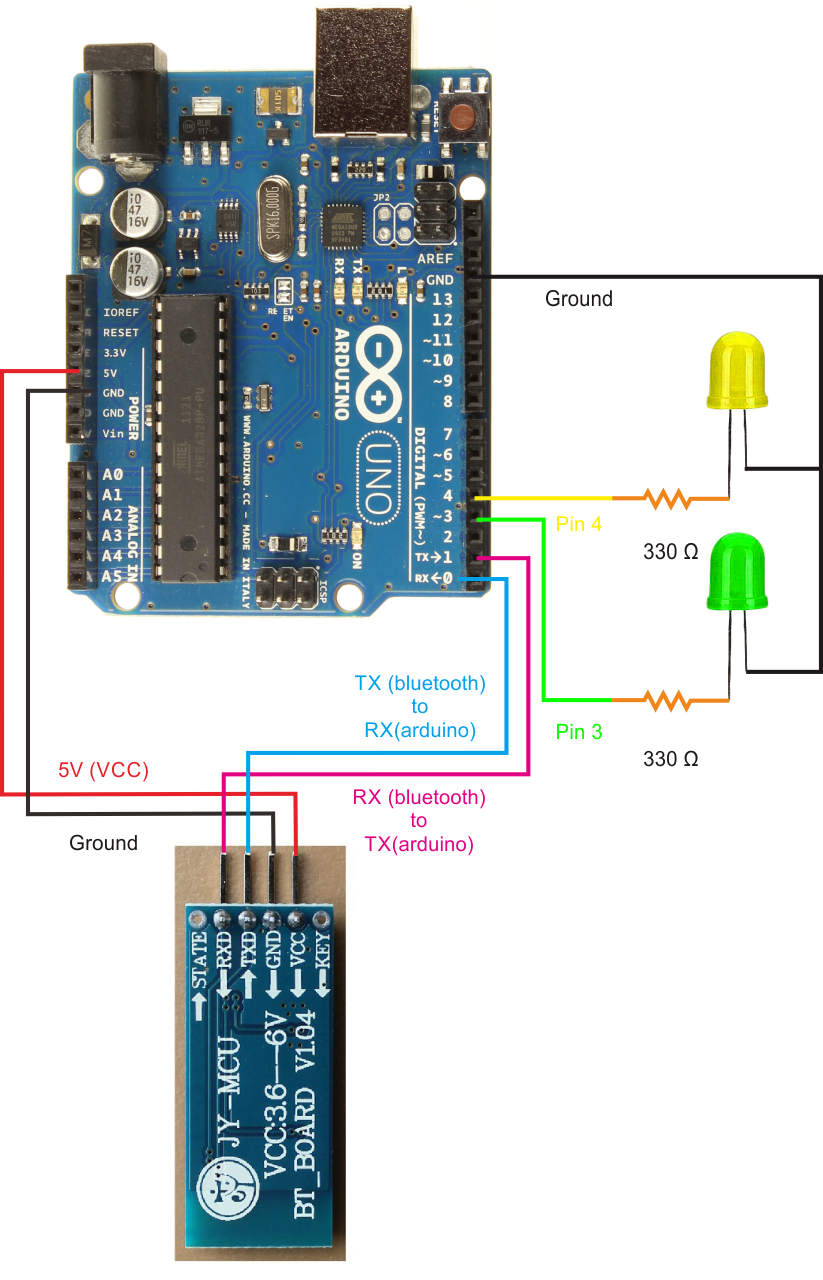
Arduino Bluetooth Module Tutorial
Step 1: Schematic, Code & Parts List. Simply wire it up like the schematic shows, I added 9 volt batteries to the Schematic but you don't need them to test. Parts list: 2x Arduino uno. FS1000A Transmitter & receiver set (add 17cm antennas, i used jumper wires.) Buzzer KY-019 1 channel relay 1 x LED color of your choice. 1 x button Module KY-004
Arduino wireless communication Botland
Step 1: What You Need USB serial adapter Two or more Wireless RS232 modules (e. g. EWRF 3022) Arduino. It's a Nano in the picture but any model should due. A gadget box Soldering equipment Basic Arduino skills Ask Question Step 2: Attach the USB Module to the Transciever The VBUS connector on the USB module provides +5v for the transciever.
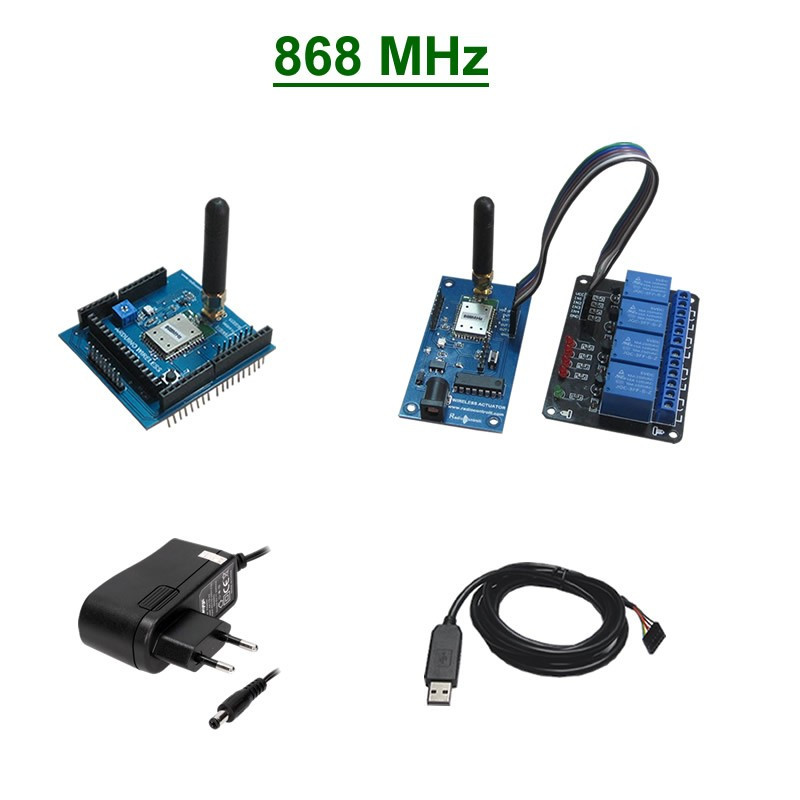
Arduino wireless 868MHz LONG RANGE
Over 80% New & Buy It Now; This Is The New eBay. Find Great Deals Now. Buy Top Products On eBay. Money Back Guarantee.

Powering MKR WiFi 1010 with Batteries Arduino Documentation Arduino Documentation
Arduino 433Mhz Wireless Communication Rc Switch By SohamG in Circuits Arduino 145,240 80 6 By SohamG Follow More by the author: In this instructable we will be seeing how to use the 433 Mhz transmitter and receiver to communicate via the arduino board. We can also use the Ht12 encoder and decoder Components Required :
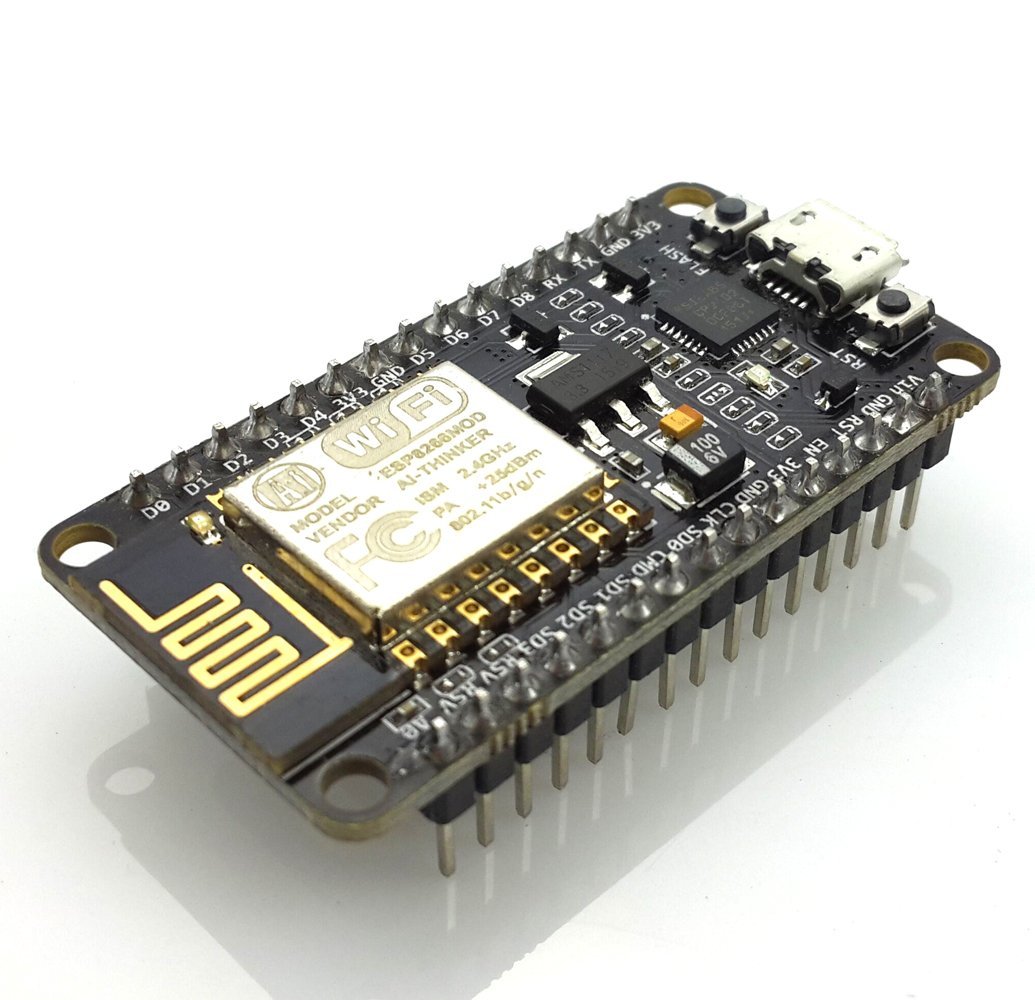
Arduino ESP8266 WiFi, on the Cheap! Arduino Academy
How the code works: So once we type something in the serial monitor and click the Send button, at the first Arduino, the while loop with the Serial.available () function will become true and using the HC12.write () function we will send the data from the serial monitor to the HC-12 module. This module will transfer the data wirelessly to the.

Pin on esp8266 mqtt
In this Arduino video tutorial, we will learn how to wireless communication between two Arduino boards using the NRF-24l01 wireless module. The basic working.
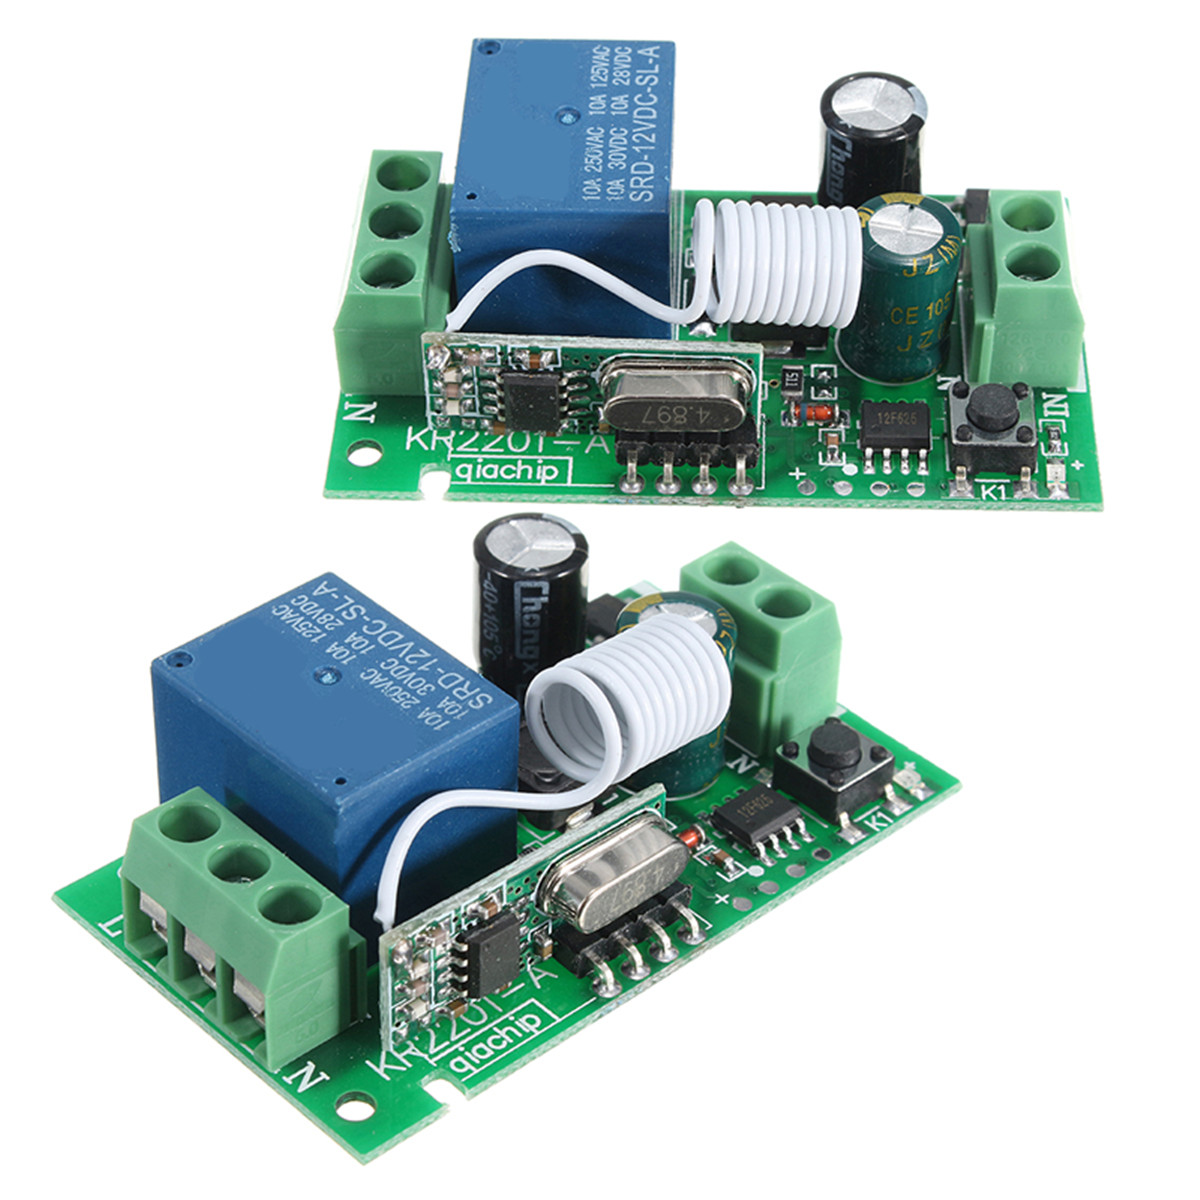
Arduino 3PCS 315MHz 220V 10A 1CH Channel Wireless Relay Remote Control Switch Receiver for
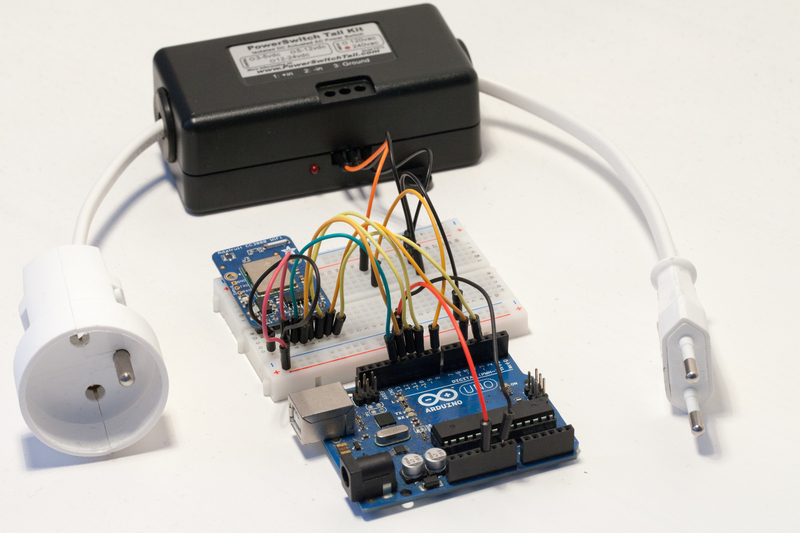
Wireless Power Switch with Arduino & the CC3000 WiFi Chip By Introduction In this project, we are going to build an open-source version of WiFi power switches that you can buy in many stores. These switches can usually be controlled from a smartphone or tablet, and give you the ability to switch on or off any device that is connected to the switch.